


My Special Birthday Present
A hand-crafted knife made by craftsmen

Introduction
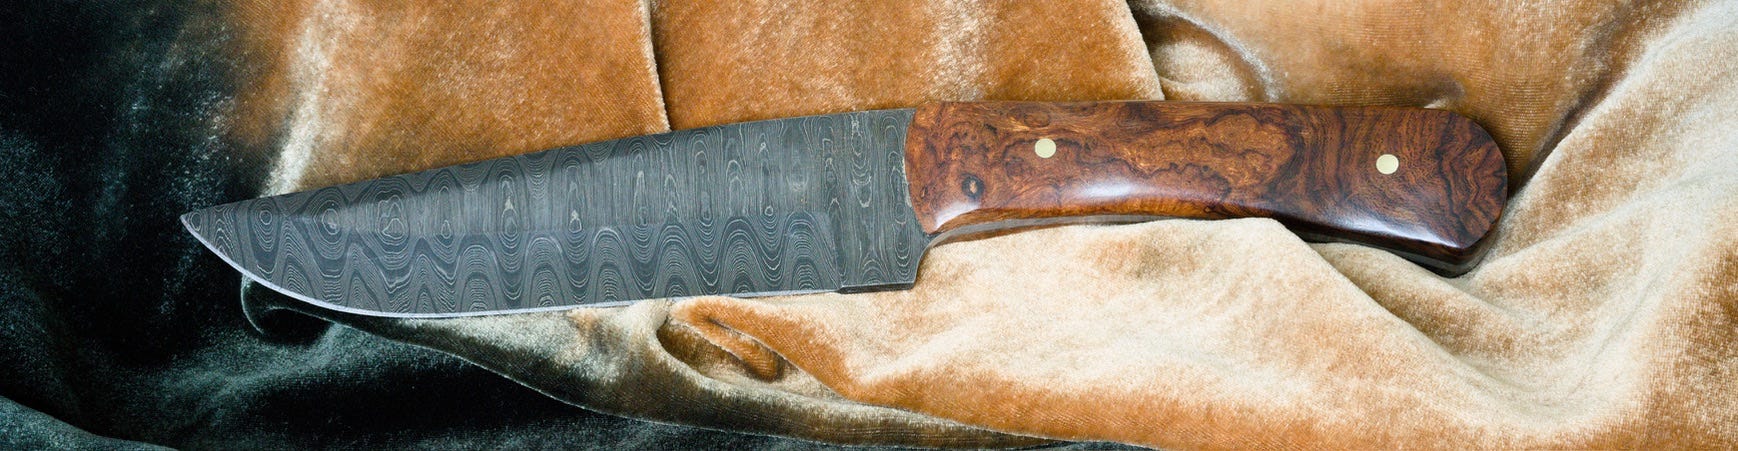
On my 83rd birthday, I received from my partner’s brother-in-law, Ron Soodalter, one of the most unique presents, a handsome hand-crafted knife.
The process began when Ron showed me the Damascus steel blade for the knife, and I got to choose the wood for the handle. I chose Arizona Desert Ironwood.
Ron purchased the blade from the Alabama Damascus Steel company. He made the handle himself, as he describes in the process below.

The Damascus Steel Blade
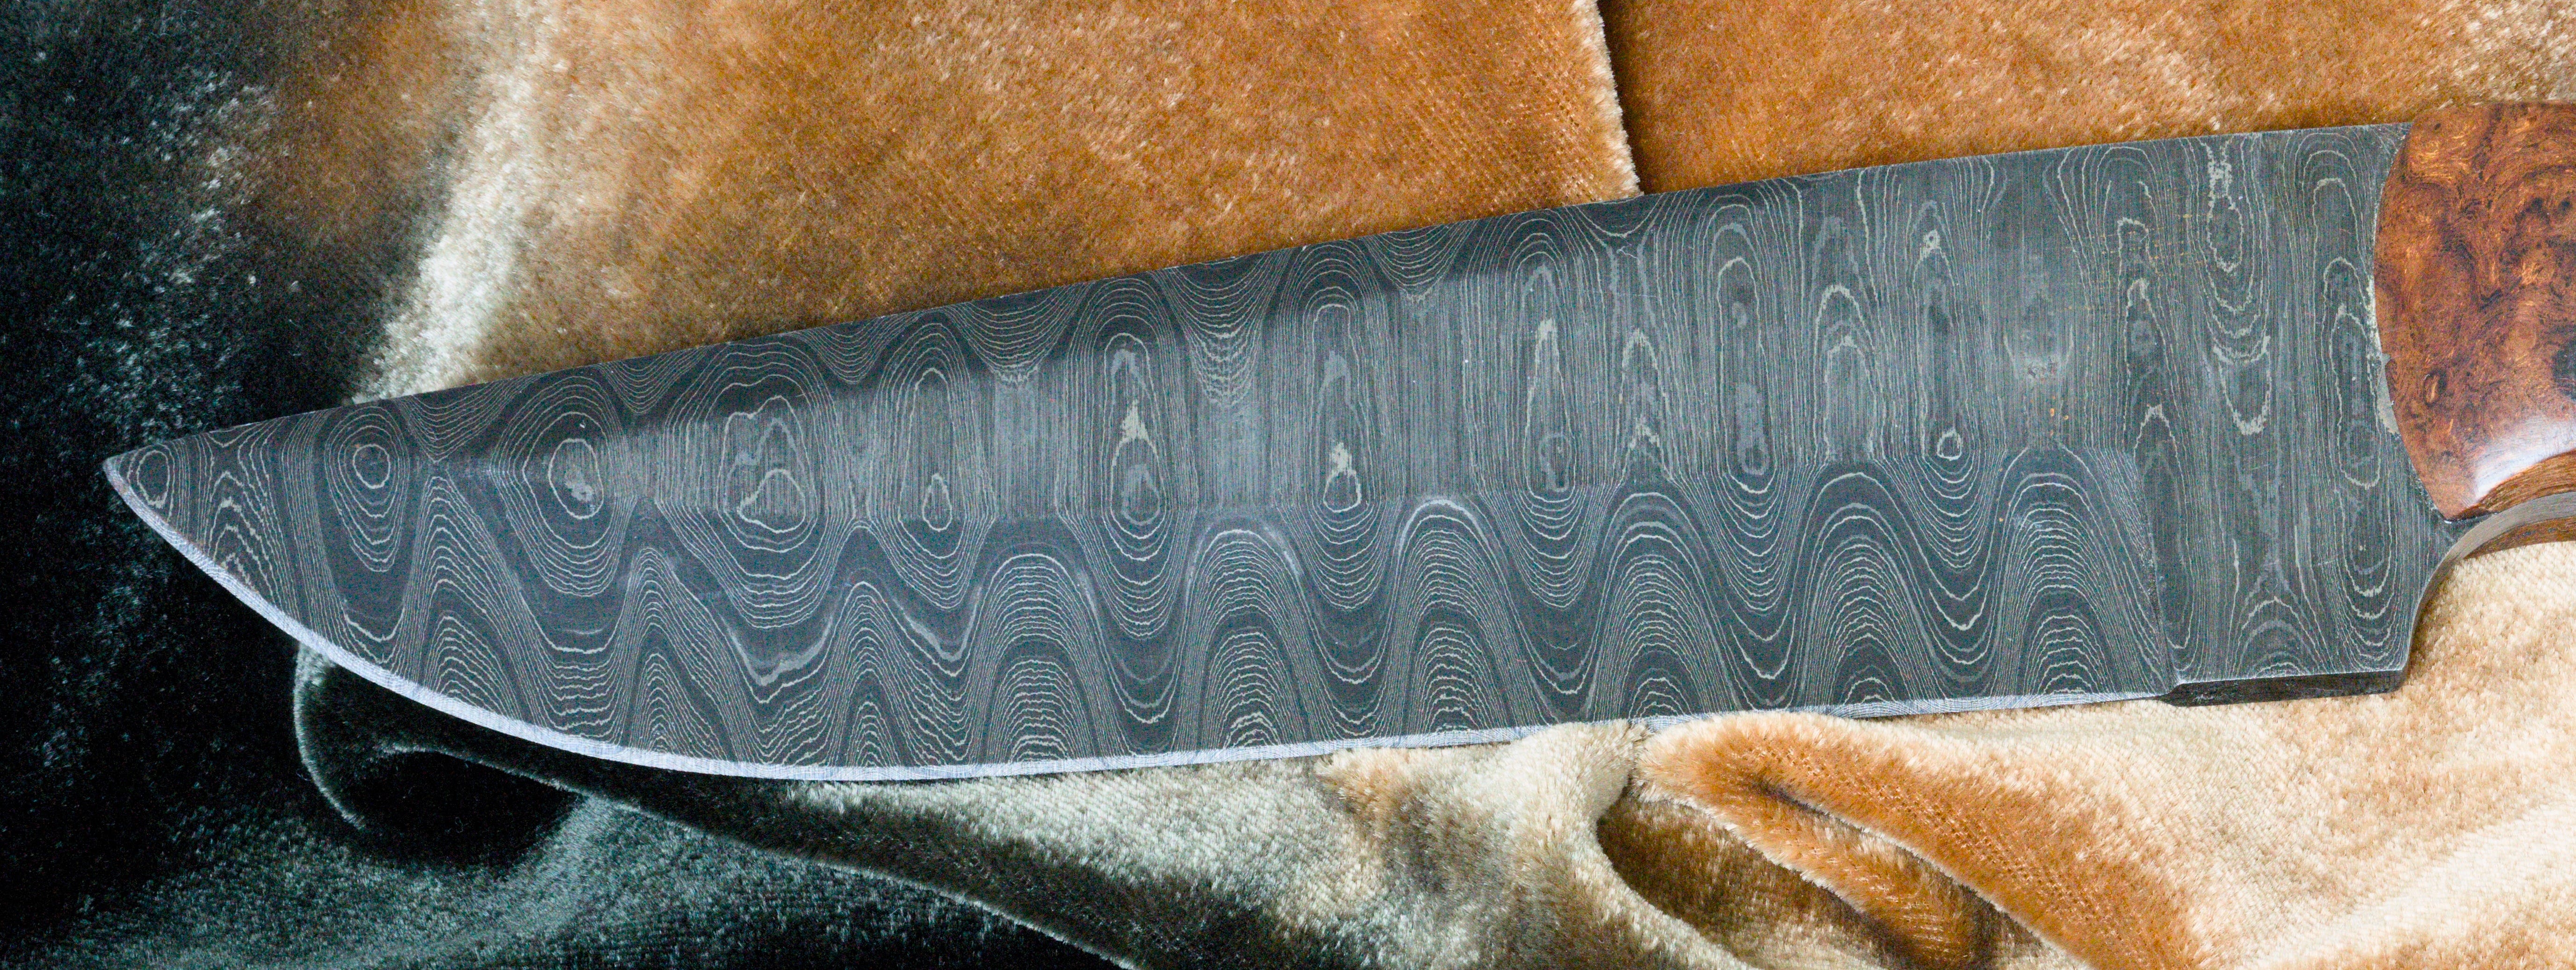
Damascus steel blades were originally from the Middle East and made from Wootz Steel from India and Sri Lanka. Modern Damascus steel is different and typically made by forge welding multiple layers of different steels together and manipulating the pattern during the forging process.
There are the several steps to the process of creating a Damascus steel blade:
Selecting Steels: One high-carbon steel for hardness and one low-carbon for contrast;
Layering and Forge Welding: Sheets of the selected steels are stacked and welded together in a forge by heating to temperatures higher than 2200 degrees Fahrenheit, and then hammering or pressing them to form a billet;
Folding and Drawing Out: The billet is folded, re-welded and drawn out multiple times to increase the number of folds and to create intricate patterns;
Pattern Manipulation: The makers twist, grind, re-stack or drill the billet in order to create patterned textures. Example patterns include the raindrop, ladder, feather, twist and mosaic patterns (My blade is a ladder pattern);
Forge to Shape and Heat Treat: The patterned billet is forged or ground into a knife shape. It then is hardened and tempered.
Etching: After being polished the blade is dipped in an acid bath which helps to reveal the pattern;
Final Steps: Creating the handle, sharpening the blade, and polishing (This is where Ron Soodalter comes in).
The Alabama Damascus Steel company sent a full page description of the process used to make the blade, and how to care for it. I am providing an abbreviated version of that page.
Heat Treating the Blade:
We use 13 layers of 5160, 6 layers of 15N20, and 6 layers of N200 nickel in our billets. Counting only the 5160, after 4 folds this makes a 416 layer billet. Billets are then annealed, precision ground, etched, and painted with a rust-protective coating.
The old fashioned way: Heat the blade until a magnet won't stick. Make sure that it is the same color all over. Quench in a light weight oil (peanut oil, 10 wt hydraulic oil, etc). Plunge quickly tip-first; do not swirl blade in oil. If you have an oven: Heat the steel up to 1550 degrees, then allow to soak for at least two minutes at that temperature. Quench in light weight oil.
Care Instructions:
To preserve the finish of the steel and increase contrast, coat the blade in a light oil (WD-40, Break-Free, etc.), clear paint, or Renaissance Wax. If used in the kitchen, Pam or mineral oil works great to prevent rust and is food safe. After use, like any quality tool, ensure blades are wiped clean, oiled, and kept dry. Note that Damascus steel can rust, so one must follow the Care Instructions.
The Blade Handle
I then asked Ron to describe the process of crafting the handle. He wrote:
“First, I found the best Damascus blade available. Once in hand, I wrapped the blade with multiple turns of heavy tape, to prevent damage during the handle-making process.
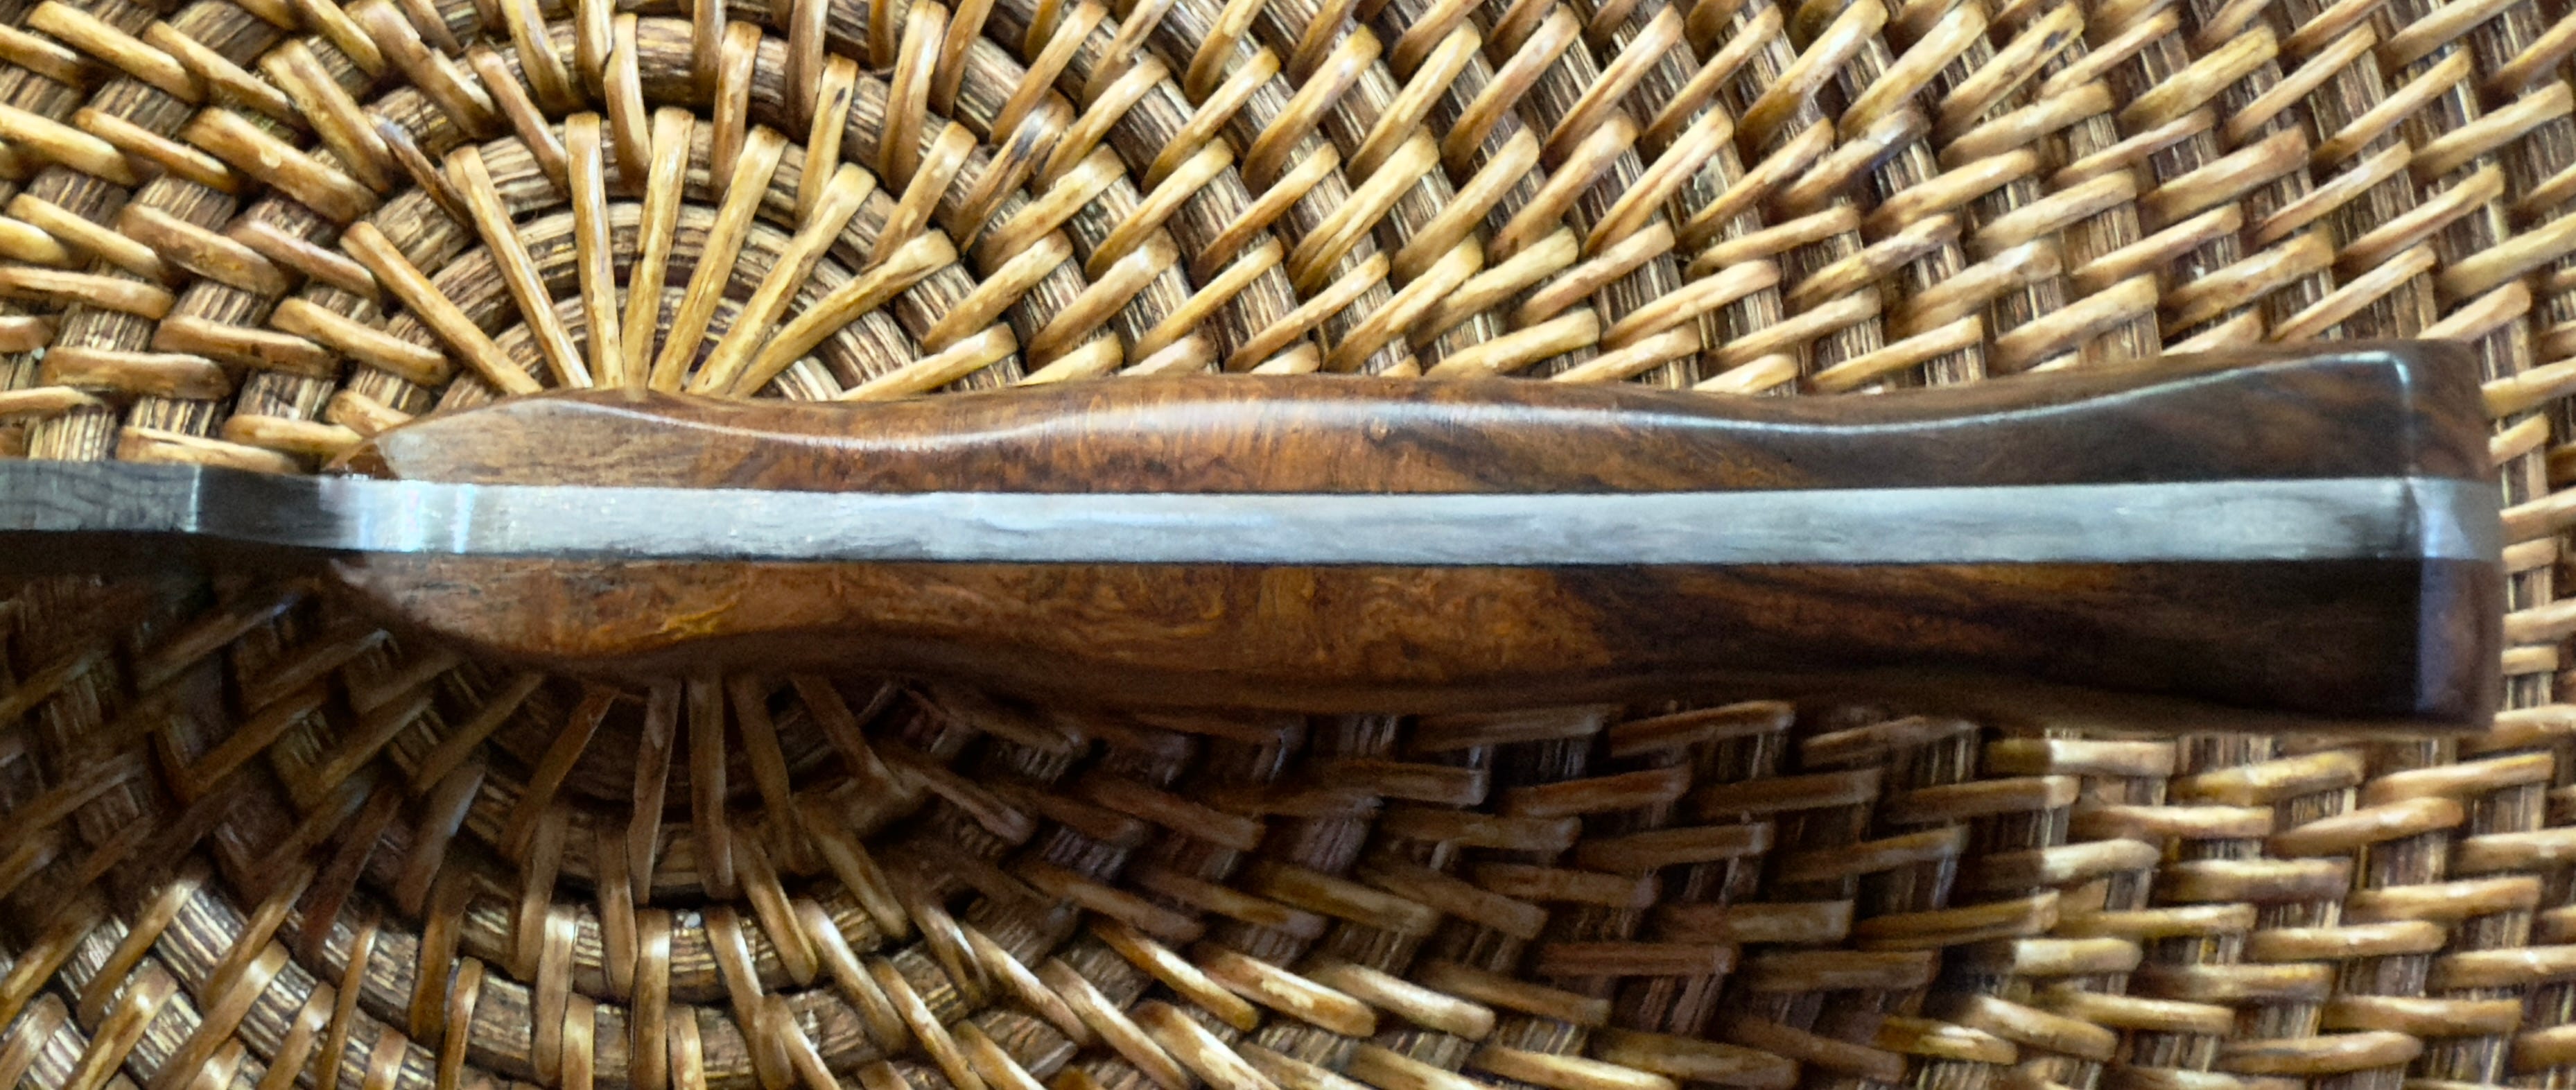
The wood selected for the handle was Arizona desert ironwood, one of the hardest, most attractively patterned woods available, and ideal for knife handles and pistol grips. I split it into two pieces with the table saw, and traced the outline of the knife handle on each piece. I then used the saw to cut a very rough outline out of each piece, leaving enough wood all around for shaping, sanding and finishing.
I then used both the belt and oscillating sanders to bring the wood scales closer to the handle shape, and thinned each to equal thickness on the belt sander.
Once the wood was refined to roughly the shape of the handle, I used a metal rasp to roughen the surface of the undersides of both the scales and the steel of the handle, creating shallow grooves to better accept the bonding agent. I then used Gorilla epoxy – one of the strongest bonding agents available – to attach one scale to the handle. Once it dried, and using the knife handle as a template, I drilled holes in the scale for the pins, ensuring that they aligned perfectly with the holes in the knife. I then epoxied the second scale, and – now using the first scale as my guide – drilled through to make a clear passage for the pins.
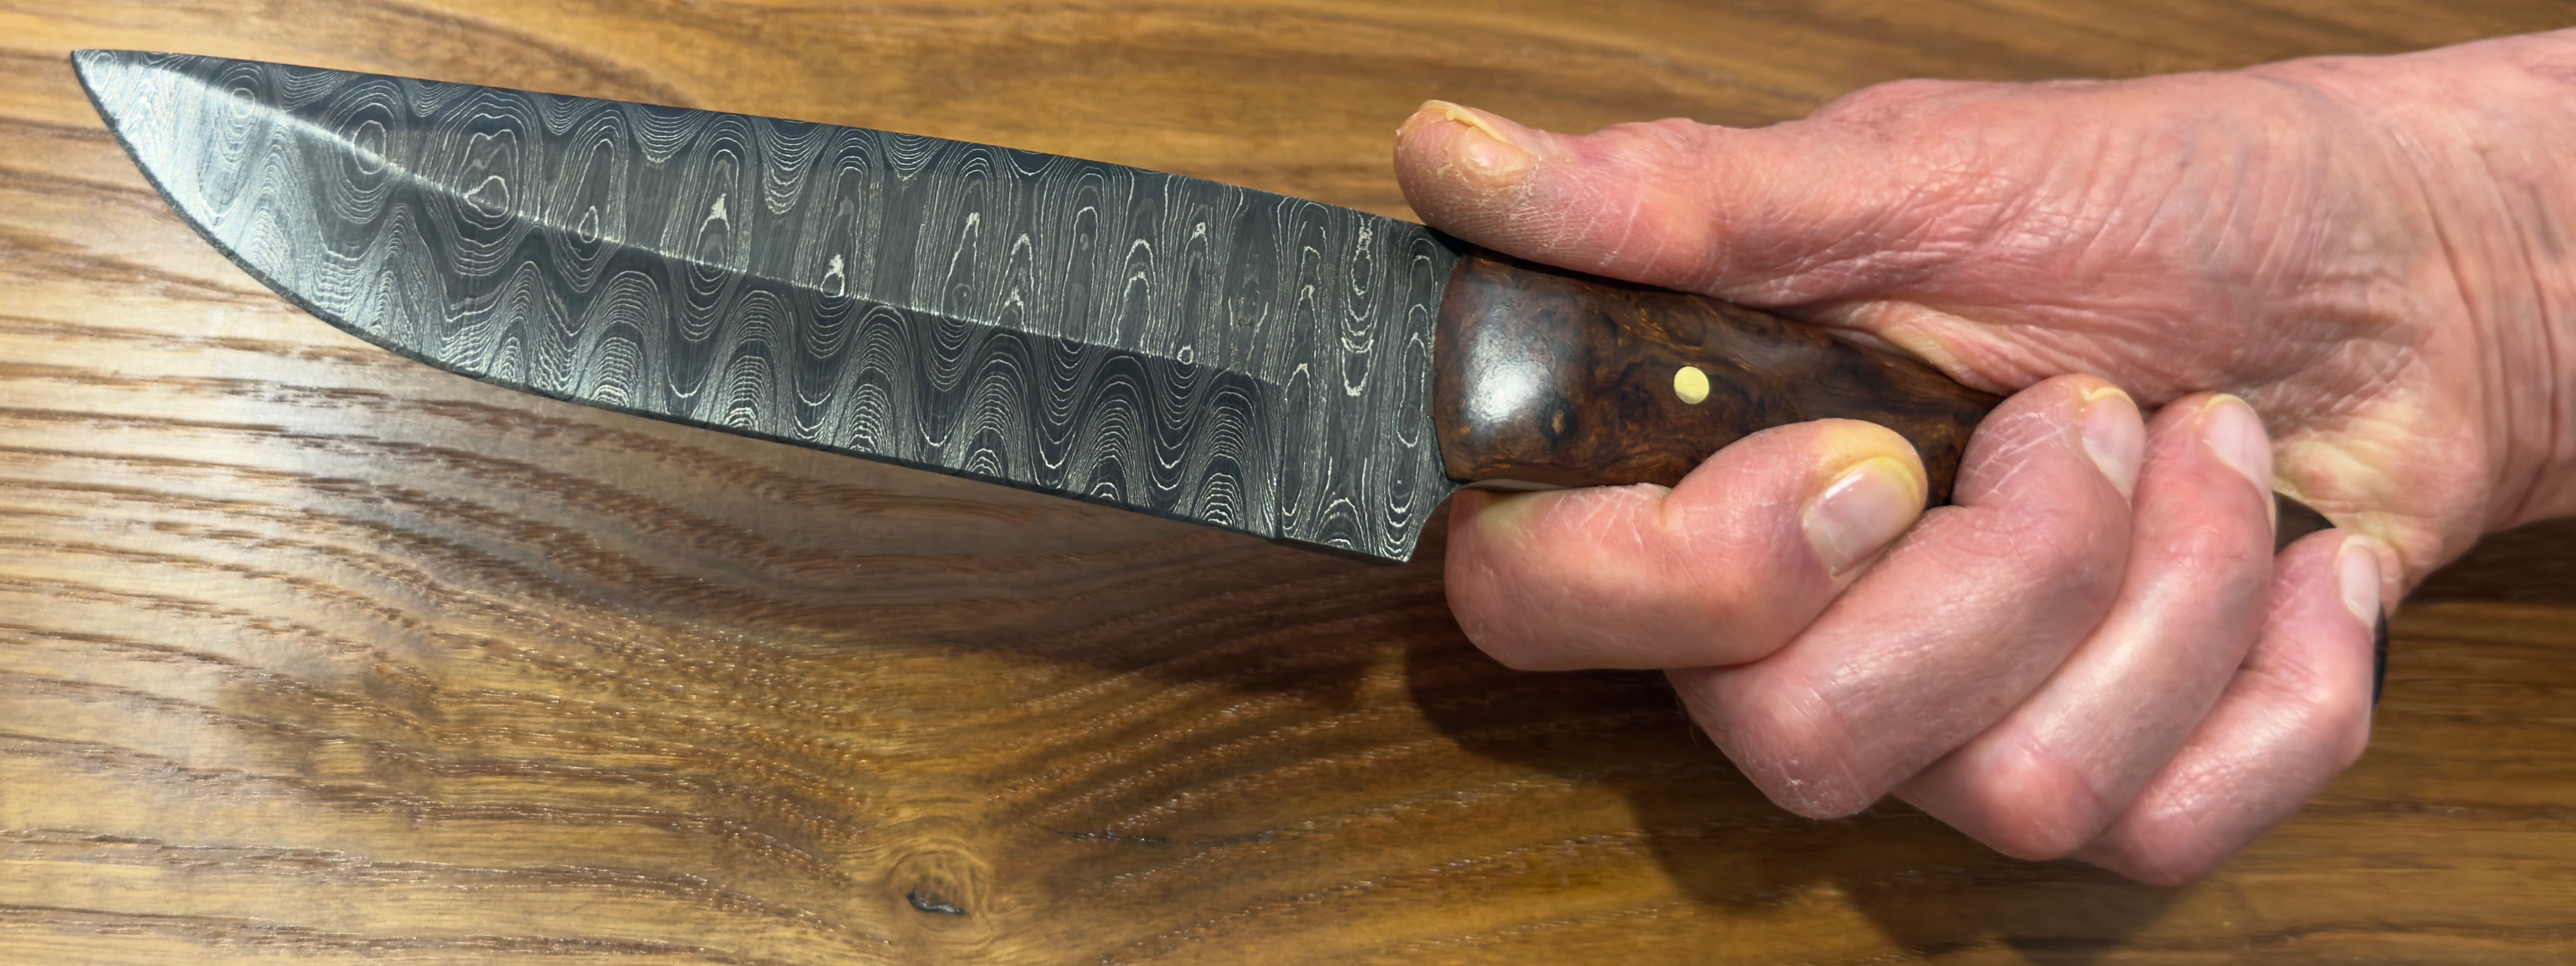
After the two sides were completely dry, I hammered in pins I’d made from a 5/32” brass rod, after filing grooves in each to hold the epoxy once driven into the holes in the handle. I then brought the wood close to the metal edges, using various grades of sandpaper on the oscillating sander. Then, with constant checking to match the dimensions of the two sides, I hand-shaped the handle into what is referred to as a coke-bottle shape, with the two ends gently graduating into a slightly thicker middle section. (This better accommodates the grip than a simple straight handle.)
Once this was done, I began the long, arduous task of hand-sanding. I started with a rough 80 grit, and – always checking for flaws – progressed through the various grits: 120, 220, 320, 400, 600, 800, 1,000, 2,000, 2400, and 3000, going back to correct any flaws, until I achieved a hyper-smooth clean surface.
At this point, all that remained was the finishing process. Given the density of the wood, it doesn’t require, nor would it accept, such finishing agents as shellac, boiled linseed oil or Tru-Oil, needing only an even buffing with polishing rouge on a wheel. I then vigorously hand-buffed the handle, for a hand-rubbed finish. Once this was done, I removed the tape, and delicately cleaned and hand-polished the blade. At this point, the knife was finished.”
Conclusions
I wanted to share with my readers something of real beauty, made by hand by true craftsmen. The fact that the finished product is by someone I know, makes this gift especially heartwarming.
In closing, Ron told me that if any of my readers would like a knife made expressly for them, they should contact me and I will forward your request to him. He will then get in touch with you.