

In my previous post regarding my birthday knife, I presented this photograph, which consists to 40 images, taken at various focal lengths and then stacked together digitally to make the final image. In this post, I want to explain how I did it.

Why would you want to use this technique? Well, the final image will be “in focus” with incredible depth-of-field.
We start by defining what “focus bracketing” and “focus stacking” are, and how to do them, either in-camera or using special software, in my case, HeliconFocus. Other software for focus stacking can be found in Adobe’s Photoshop, Zerene Stacker and Affinity Photo.
I decided to ask my buddy, ChatGPT, to explain both “focus bracketing” and “focus stacking” and here is its response:
What is Focus Bracketing?
Focus bracketing is when the camera takes multiple images of the same scene, each with a slightly different focus point, which can be combined later via focus stacking.
What is Focus Stacking?
Focus stacking is the process of taking multiple images of the same scene, each focused at a different distance, and then combining them into a single image that has a much deeper depth-of-field.
How is it done?
First, one photographs the image multiple times, either by doing it manually by focusing the camera at varying focal points – from close up to farther way – or by letting the camera do it automatically.
I suggest using a tripod for multiple shots, and controlling the lighting on the subject. This technique is especially good for product shots and macro photography, where the subject does not move.
The goal is to increase the depth-of-field by stacking multiple shots at different focus points.
In my research, I found a whole raft of cameras that support both focus bracketing and/or focus stacking, and some even do the stacking in-camera. Here is a list of cameras that I found from ChatGPT and from searching the Internet. You should check on your particular camera, mode, and firmware to determine its capabilities.
Table: Camera Brands and support for Focus Bracketing and Stacking.

My Camera and Workflow
In creating the knife photograph, I used a Hasselblad X2D with a 75 mm XCD lens. My aperture setting was f8 for all of the 40 images. I used a “small” step size and the “symmetric method” of focusing, each at a different focal length and then combined the images using HeliconFocus software.
Hasselblad provides excellent Phocus software for the Mac and for iOS. The latest firmware – version 4.0.0.0 – supports tethering the camera to the Mac via the Phocus software. One then enables focus bracketing in the settings.

The Hasselblad X2D manual talks about three methods to focus during bracketing: Toward Infinity, Towards Near Limit, and Symmetric. For the first, the camera is focussed on a point that is closer to the camera than the main subject. In the second approach, the focus point is behind the main subject.
In the Symmetric approach – the one I used – focus should be set on the main subject. When the sequence has started, the camera will first take an image, then move focus to a focus point closer to the near limit, and take all of the images in the sequence, shifting focus towards infinity. The first image is an extra exposure made to ensure that there is at least one image of the main subject with perfect focus.
The Hasselblad images out-of-camera are in 16-bit Raw and use a proprietary format – the image names end in 3fr suffix. I could have exported the images in TIFF format and imported them into HeliconFocus. But I wanted to eventually use Lightroom to edit the final HeliconFocus-image, so I used the DNG format.
I exported the 40 Hasselblad images in Adobe’s DNG format and placed them in a folder.
I then loaded the images from that folder into HeliconFocus to begin the stacking process. The photo below shows HeliconFocus at work on the knife image with an interim image on the right hand side.
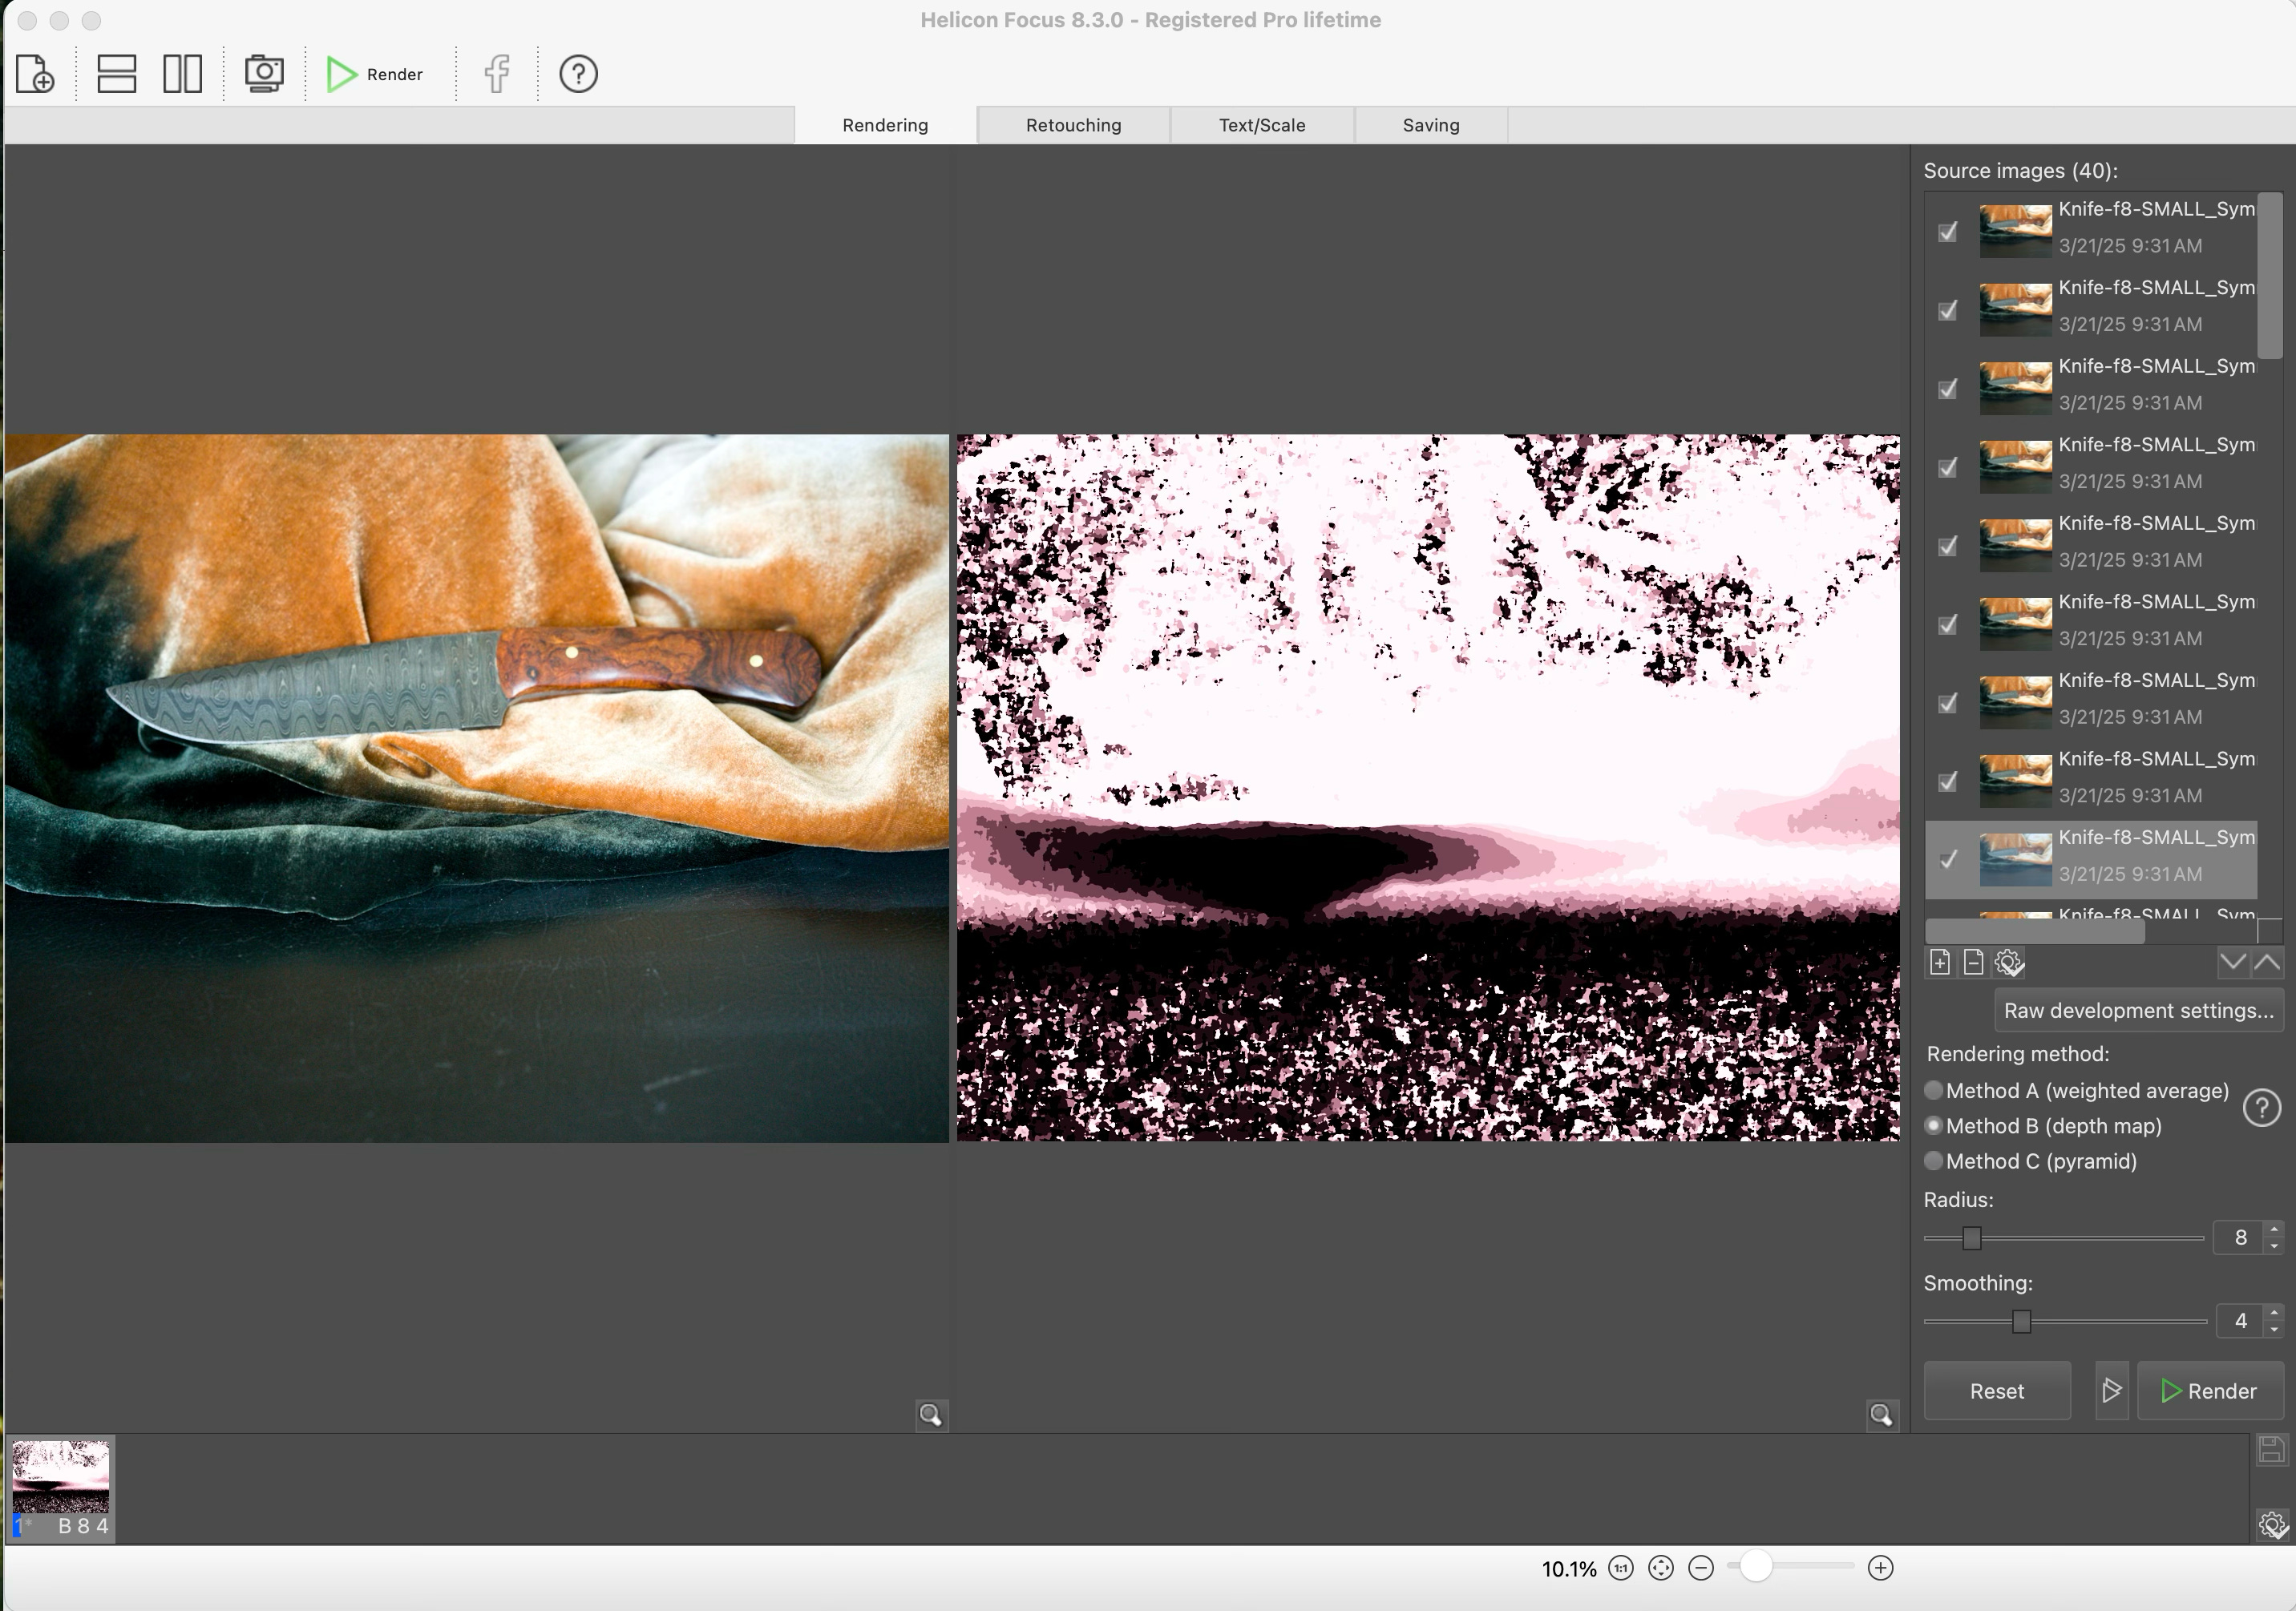
The image on the left is the first of the 40 images used. The one on the right shows the partial processing that eventually results in the final image.

I imported the final image into Lightroom for further processing.
During HeliconFocus’ processing of the images, it uses Adobe’s RAW Converter software on the images. To learn more about HeliconFocus software I refer you to the website.
Conclusions
Focus bracketing and stacking are good to use when you want to shoot a product that is stationary, and you want to boost the depth-of-field. I found it essential to use a tripod to avoid any hand-held artifacts, although image stabilization is quite good on this camera.
It is one more technique in our bag of tricks. I would like to hear from you if you have experience with focus stacking and share some photos with our group. You might be motivated to try it based on this article.
Sony delivered in-camera focus bracketing for the original Sony A1 via a firmware update in January 2025. It is also in the A1 II and the A9 III. They still don't have in camera stacking and I have used Helicon Focus as well and agree it is very easy to use. I sold my A1 to help fund the A1 II and it was worth it to gain precapture for birds in flight.